Account Entry Guide
This guide will help you navigate through the features and functionalities of Accounts and Engagements in BizVue.
Getting Started with BizVue
1. Log In:
Once you log in, you will be directed to the BizVue home page. The home page displays a dashboard that gives you an overview of the app’s core features. The navigation menu is located on the left side of the screen.
2. Access Accounts:
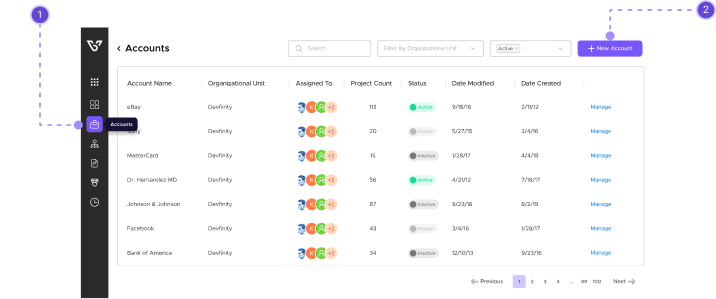
- Click on Accounts in the navigation menu.
- On the Accounts page, click on + New Account at the top right.
Adding an Account in BizVue
To add an account, complete the following steps:
1. Add Account:
- Enter account/Client Name
This name is usually the same as the Client Name on the Engagement. - Add AP Email
Click the Plus (+) next to AP Email, enter the email, and click submit. You can add or delete multiple AP Emails from this menu.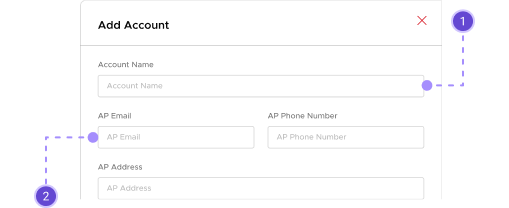
- Enter AP Phone Number
- Enter AP Address
Sometimes this differs from the client’s business location. - Enter City, State, and ZIP code of the client’s business location.

- Select Primary Organizational Unit (OU)
These base units can be named after Business Locations or Sister Companies. An OU is required for most operations in BizVue. - Search and Select Sold By User
Denotes the salesperson who made the sale.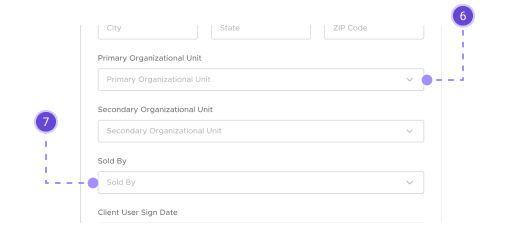
- Search Client User Sign Date
Open calendar and select. - Click Create
Leave Display Rate on Invoice checked unless you wish to leave the rate invisible on the invoice.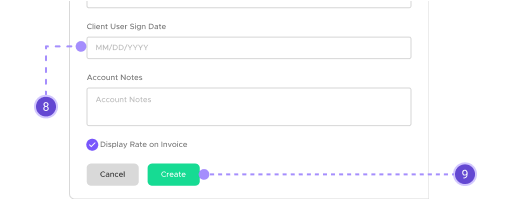
2. Add Engagement:
- Enter Engagement Name
Normally the same as the client name. - Select Engagement Type
Fixed or hourly.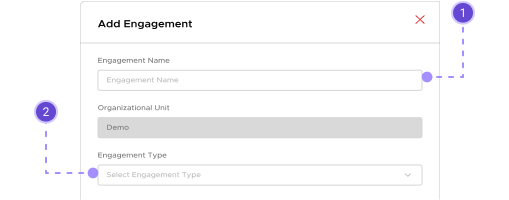
- Select Billing Cycle Start Date
Open Calendar and select. - Select Frequency
Monthly, Bi-Weekly, Weekly.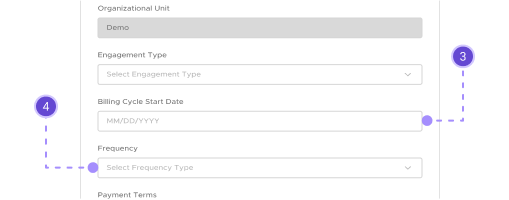
- Select payment Terms
Usually Net 5 Business Days. - Add Commission if Applicable
Refer to Commission Cheat Sheet. - Click Create

3. Add Consultant/Internal Users and Bill Rates:
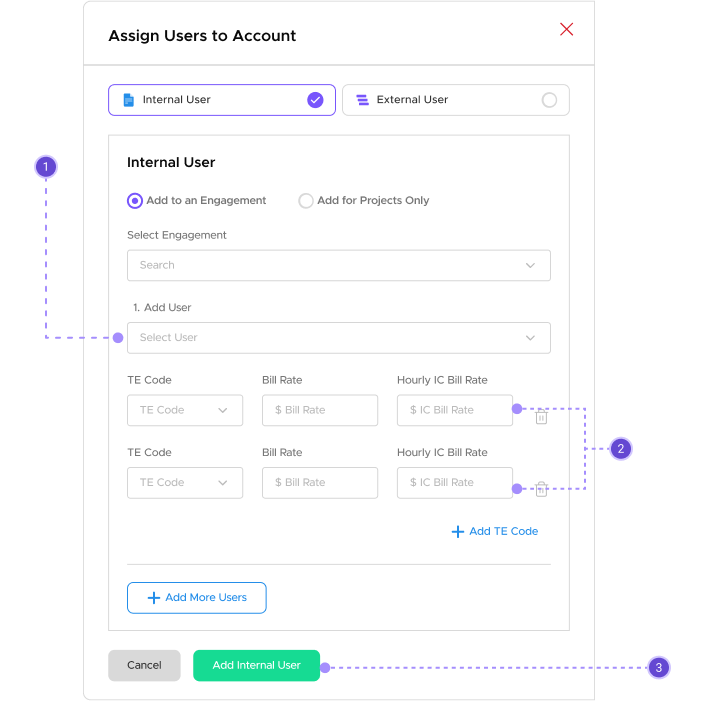
- Add User
Select the user. - Add Bill Rate
Select the appropriate TE Code and enter the Bill Rate | IC Rate (Intercompany Rate). - Click Add Internal User
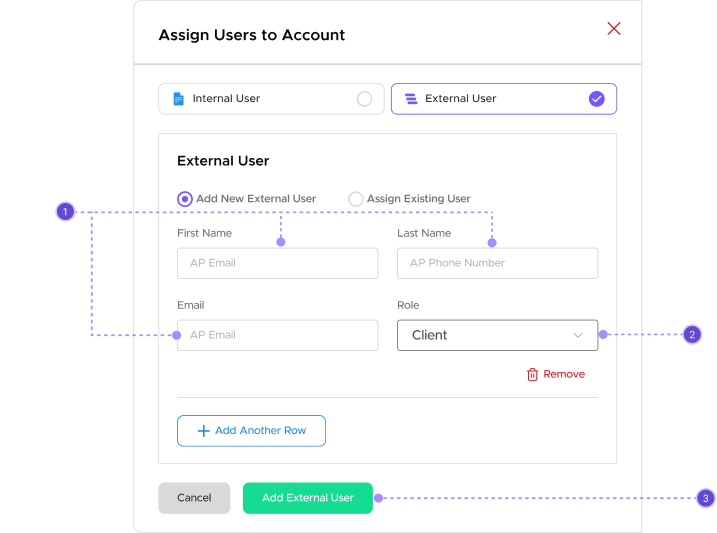
4. Add Client/External Users:
- Enter Client’s First Name, Last Name, and Email
- Select Client
- Click Add External User
Completing the Account Setup
The client account and engagement are now created! You can add users from this screen directly or go to the Account Management Page and add them there. To make any changes to Accounts, navigate to the Accounts page, search for the appropriate Account name, and click on the Manage button on the right side of the page.

Frequently Asked Questions (FAQs)
Our FAQ section is designed to provide quick answers and support for managing accounts and engagements in BizVue. Whether you’re adding new accounts, adjusting user settings, or understanding billing terms, you’ll find helpful information here. For further assistance, please contact our support team at support@bizvue.io.
What are the differences between Internal and External Users?
How do I edit an Account after it’s been created?
What is an IC rate on the Engagement Letter?
I have questions about Account Entry in BizVue, who do I reach out to if I have any questions?

This guide aims to provide a comprehensive understanding of how to manage accounts and engagements in BizVue. Follow these steps to streamline your workflow and enhance client management.


